


- Open WebUI self-hosting puts a full ChatGPT-style interface on your own server, with no third-party data exposure.
- Open WebUI self-hosting supports Ollama backends, OpenAI-compatible APIs, and per-user access controls out of the box.
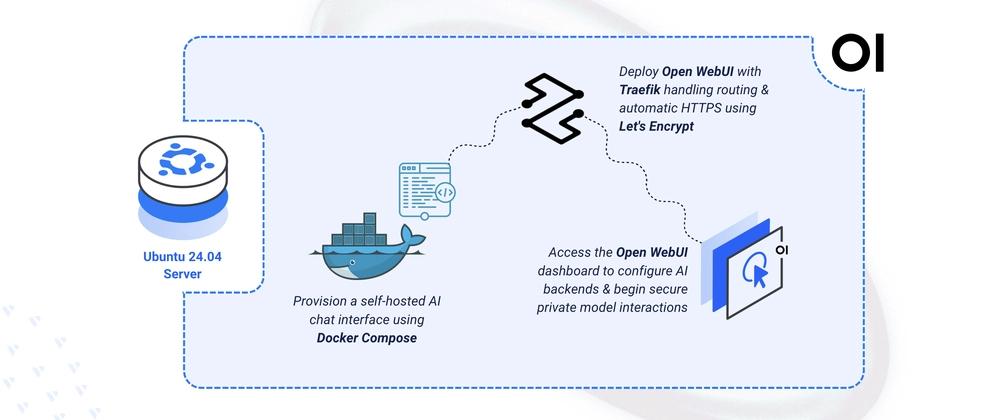
- The entire stack runs in Docker Compose with Traefik handling automatic HTTPS via Let’s Encrypt certificates.
- Once deployed, you can enable document-based RAG, set model permissions, and manage users from a built-in admin panel.
Table of Contents
Why Open WebUI Self-Hosting Is Attracting Serious Attention
Open WebUI self-hosting has quietly become one of the most practical ways to run a private AI assistant — and interest is accelerating fast. With ChatGPT usage data flowing through OpenAI’s servers and enterprise AI tools increasingly under regulatory scrutiny, the case for keeping your AI interface entirely on infrastructure you control has never been stronger. Open WebUI, the open-source project hosted on GitHub and actively maintained by its community, delivers a polished, ChatGPT-style web interface that you can spin up on your own server in under an hour.
The project isn’t just a hobby experiment. It supports Ollama backends for fully local model inference, OpenAI-compatible API endpoints for cloud model access, retrieval-augmented generation (RAG) via document uploads, and granular per-user authentication and permissions. That’s a feature set that competes directly with commercial tools that charge per seat. For privacy-conscious developers, small teams, or anyone running sensitive workflows, Open WebUI self-hosting is a combination that’s hard to ignore.
What You Actually Need Before You Start
Open WebUI self-hosting assumes you’re working with Ubuntu 24.04 — either a VPS from a provider like Vultr, a dedicated machine, or a local server. You’ll need Docker and Docker Compose installed, a domain name pointed at your server’s IP address, and ports 80 and 443 open in your firewall. The domain is non-negotiable here: Traefik’s automatic HTTPS relies on Let’s Encrypt’s HTTP challenge, which requires a publicly reachable domain to issue a certificate. If you’re running this purely on a local network without a public domain, you’ll need to handle TLS differently — or skip HTTPS entirely for internal use, though that’s not recommended for anything beyond testing.
The stack itself is lean. Two services: Traefik as the reverse proxy and TLS terminator, and Open WebUI itself. No database container to babysit — Open WebUI handles persistence through a local data volume, keeping things simple. The total Docker image footprint is manageable even on a modest VPS with 2–4GB of RAM, assuming the actual AI model inference is handled by a separate backend.
Setting Up the Project: Directory, Environment, and Compose File
Start by creating the project directory and a data subdirectory where Open WebUI will store its application data — user accounts, settings, uploaded documents, and conversation history. Keeping this in a named volume or bind mount means your data survives container restarts and image updates without any extra effort.
The environment file is minimal but important. You set two variables: your domain name and the email address Let’s Encrypt uses to issue and renew your TLS certificate. These get interpolated into the Docker Compose manifest, so there’s no need to hardcode sensitive or environment-specific values directly into the compose file — a good habit whether you’re running Open WebUI self-hosting for a personal project or something more production-like.
The Docker Compose manifest itself is where the real configuration lives. Traefik v3.6 is specified, which is the current stable release and brings meaningful improvements in routing configuration over v2. Traefik is configured to listen on ports 80 and 443, automatically redirect all HTTP traffic to HTTPS, and use Let’s Encrypt’s HTTP challenge resolver to obtain and renew certificates. Certificate data is stored in a named Docker volume so it persists across restarts — if it weren’t, you’d hit Let’s Encrypt’s rate limits fast by requesting new certs on every container restart.
Open WebUI runs on port 8080 internally but never exposes that port directly to the host. Instead, Traefik’s labels on the container tell Traefik to route incoming HTTPS requests matching your domain to that internal port. The WEBUI_AUTH=true environment variable ensures authentication is enforced from the start — anonymous access is disabled by default, which is exactly what you want on a public-facing Open WebUI self-hosting deployment.
Open WebUI Self-Hosting: Deployment and First Login
With the compose file in place, bringing the stack up is a single command: docker compose up -d. Docker pulls both images, creates the network, mounts the volumes, and starts the containers in the background. The first time you run this, Traefik will immediately attempt to obtain a Let’s Encrypt certificate for your domain — assuming DNS is properly configured, this typically completes within a minute or two.
You can verify both containers are running with docker compose ps, and tail the logs with docker compose logs if anything looks off. Common issues at this stage are DNS propagation delays, firewall rules blocking port 80 (required for the HTTP challenge), or the data directory having incorrect permissions. The logs from both Traefik and the Open WebUI container are reasonably informative and will surface most problems quickly.
Once the certificate is issued, navigating to your domain in a browser brings up the Open WebUI registration page. The first account you create automatically becomes the administrator — there’s no separate admin setup step. Subsequent users can register through the same interface and are assigned standard user roles by default. From the admin panel you can promote users, restrict model access, and set rate limits, which makes Open WebUI self-hosting practical for small team deployments rather than just personal use.
Connecting Models and Unlocking the Full Feature Set
A deployed Open WebUI self-hosting instance without a model backend is just a very nice login screen. Connecting it to something useful is the next step, and you’ve got real flexibility here. The most popular pairing is Ollama, the local model runner that lets you pull and run models like Meta’s Llama 3, Mistral, Gemma, and dozens of others entirely on your own hardware. If your server has a capable GPU — or even a modern CPU with enough RAM — Ollama can serve models locally with no external API calls whatsoever. That’s the full privacy-first setup: Open WebUI handles the interface, Ollama handles the inference, and nothing leaves your server.
For those who want cloud model access without giving up the self-hosted interface, Open WebUI self-hosting also supports any OpenAI-compatible API endpoint. That means you can point it at OpenAI’s own API, Anthropic’s Claude via compatible proxies, or any number of open-source inference servers that implement the same API spec. The interface itself stays consistent regardless of which backend you’re using.
The RAG feature deserves a mention because it’s surprisingly capable for a self-hosted setup. You can upload documents directly to Open WebUI’s knowledge base, and the system will chunk and index them for retrieval during conversations. For teams that want a private document Q&A system — think internal wikis, contracts, technical documentation — Open WebUI self-hosting turns the platform into something substantially more useful than a generic chat interface. It’s not going to match a purpose-built RAG pipeline for scale or accuracy, but for a self-contained deployment, it punches well above its weight.
The Bigger Picture: Self-Hosted AI Is Becoming Infrastructure
What’s notable about Open WebUI self-hosting in 2025 is that it no longer feels like a workaround for people who can’t afford commercial tools. The tooling has matured to the point where the gap between a self-hosted AI interface and a SaaS product is largely a matter of convenience, not capability. Models available through Ollama are increasingly competitive with commercial offerings for many use cases, and the infrastructure overhead — as this setup demonstrates — is genuinely manageable even without a dedicated ops team.
The privacy and compliance angle is becoming a real driver too. In regulated industries — healthcare, finance, legal — sending data to third-party AI APIs creates compliance exposure that many organizations simply can’t accept. A self-hosted stack that keeps all data on-premises sidesteps those concerns entirely. As AI becomes more deeply embedded in workflows, that calculus is only going to push more teams toward Open WebUI self-hosting and similar infrastructure they own outright rather than APIs they depend on.