


- Deploying MongoDB on Ubuntu 24.04 with Docker Compose takes minutes and gives you persistent, authenticated storage from day one.
- Running MongoDB on Ubuntu inside a container keeps your host system clean and makes version upgrades far less painful.
- Authenticated access via environment variables and a root user is the minimum viable security baseline before any app connects.
- After setup, scoped database users and TLS certificates should be your next two hardening steps — not optional extras.
Table of Contents
Why MongoDB on Ubuntu Still Makes Sense in 2024
Getting MongoDB on Ubuntu up and running is one of those tasks that sounds deceptively simple — and then punishes you the moment you skip a step. MongoDB remains one of the most widely deployed NoSQL databases in the world, powering everything from e-commerce catalogues to real-time analytics pipelines. And while managed cloud options like MongoDB Atlas have matured considerably, there are still plenty of legitimate reasons to self-host: cost control, data sovereignty, latency requirements, or just the fact that your stack lives entirely on a server you already own.
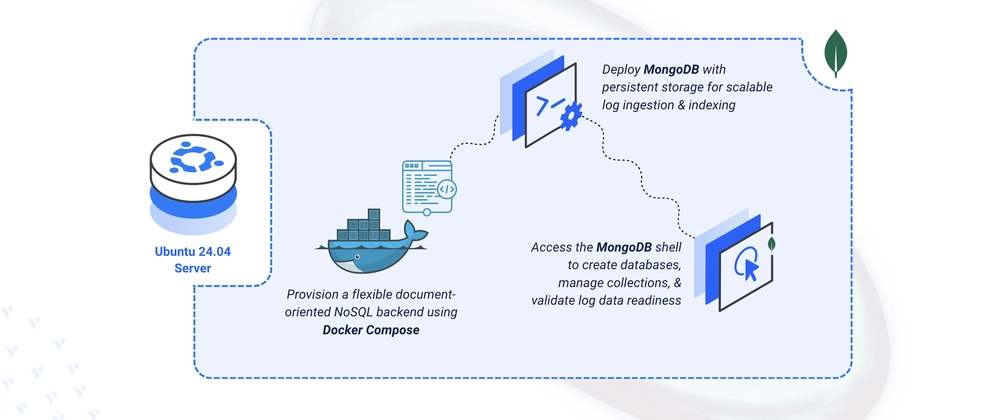
What’s changed is the deployment approach. Dropping MongoDB directly onto a host OS used to be the default. These days, running MongoDB on Ubuntu inside a Docker container — specifically with Docker Compose — is almost always the smarter call. You get process isolation, straightforward volume management, easy restarts, and a reproducible setup that a teammate can clone and spin up in minutes. That’s the approach this guide takes, and it’s the right one for most teams.
Setting Up the Project Structure for MongoDB on Ubuntu
Before a single container starts, you need a sane directory structure and an environment file that keeps your credentials out of your compose manifest. These two things alone prevent most of the configuration disasters that show up in server post-mortems.
Start by creating your project directory and a subdirectory for MongoDB’s data:
- Create ~/mongodb-logging/mongodb-data — the subdirectory will become the persistent volume mount point inside the container.
- Navigate into ~/mongodb-logging — all subsequent files live here, keeping everything self-contained.
Next, create a .env file in that directory. This is where your root credentials go. The environment file approach is critical: it means your docker-compose.yaml never contains a hardcoded password, which matters the moment that file touches version control. Set MONGO_ROOT_USERNAME to something other than the obvious, and pick a password that isn’t changeme — seriously, the number of exposed MongoDB on Ubuntu instances that made headlines between 2017 and 2019 because of weak or missing authentication is genuinely alarming. MongoDB’s own breach reports from that era showed hundreds of thousands of exposed databases, many with no password at all.
Writing the Docker Compose Manifest
The Docker Compose file for MongoDB on Ubuntu is refreshingly concise. The service pulls the official mongo:latest image, names the container and hostname mongodb, and exposes port 27017 — the standard MongoDB port — on the host. The persistent volume mounts ./mongodb-data on the host to /data/db inside the container, which is where MongoDB writes all its data files by default.
Two environment variables wire up authentication at initialisation time: MONGO_INITDB_ROOT_USERNAME and MONGO_INITDB_ROOT_PASSWORD, both pulled from the .env file via Compose’s variable interpolation. The restart: unless-stopped policy keeps the database coming back after reboots or crashes without requiring manual intervention.
One thing worth paying attention to here: mongo:latest will pull whatever the current stable release is at build time. That’s convenient for a first deployment, but if you’re building for anything approaching production, pin the image to a specific version tag — something like mongo:7.0. Floating on latest means an image pull during a routine restart could silently upgrade your database engine, which is exactly the kind of surprise you don’t want at 2am.
Starting and Verifying the Service
Bringing the MongoDB on Ubuntu stack up is a single command: docker compose up -d. The -d flag runs it in detached mode, handing your terminal back immediately. From there, docker compose ps gives you a quick health check — you want to see the container in a running state, not restarting in a loop, which usually signals a credential or volume permission issue.
The logs are your first debugging tool if something looks wrong. docker compose logs will show you MongoDB’s startup output, including whether authentication initialised correctly and whether the storage engine attached to the volume without errors. MongoDB’s startup logs are actually quite readable compared to some database engines — you’ll see explicit messages about the WiredTiger storage engine initialising, listening on the expected port, and completing auth setup.
Connecting With mongosh and Running Your First Queries
Once the container is healthy, you can open an interactive MongoDB shell directly inside it. Exec into the container with docker exec -it mongodb mongosh -u admin -p changeme (substituting your actual password). The mongosh shell — MongoDB’s modern JavaScript-based CLI, which replaced the older mongo shell in recent versions — drops you into an authenticated session as the root user.
From there, the workflow is straightforward. Switch to a new database with use logs, insert a document into a collection called application_logs using insertOne(), then query it back with find(). This isn’t just a hello-world exercise — it confirms that reads and writes are working end-to-end through the authentication layer and that data is persisting to the volume mount.
Creating an index on the timestamp field in descending order is a good instinct for a logs collection. Without an index, any query filtering or sorting by timestamp will perform a full collection scan — tolerable with a hundred documents, painful with a million. MongoDB’s createIndex() method handles this, and you can verify indexes exist with db.application_logs.getIndexes().
Hardening Your MongoDB on Ubuntu Deployment
A root user with full database access is a workable starting point, but it’s not where you want to stay. The right next step is creating application-scoped users with db.createUser(), granting only the specific roles each application actually needs. If your app only reads from one database, its user shouldn’t have write access — and it certainly shouldn’t have root. This principle of least privilege is foundational, and MongoDB’s role-based access control makes it straightforward to implement.
On the network side, the default configuration for MongoDB on Ubuntu binds port 27017 to all interfaces on the host. That’s fine if your firewall is already locking down access, but binding explicitly to 127.0.0.1 is cleaner — it means MongoDB only accepts connections from the local machine, and remote access goes through a VPN or SSH tunnel rather than the open internet. Combine that with TLS by mounting your certificates into the container and enabling –tlsMode requireTLS, and you’ve covered the main attack surface.
These aren’t hypothetical concerns. The MongoDB ransomware wave of 2017 — where attackers wiped thousands of databases and left ransom notes — targeted instances with no authentication and open network exposure. The patches for both are simple. There’s no excuse for skipping them.
What Comes Next
A containerised MongoDB on Ubuntu deployment with authenticated access and persistent storage is a solid foundation. Where you go from here depends on scale. Single-node setups work fine for many applications, but if you’re expecting serious write volume or need high availability, MongoDB’s replica sets are the natural next step — and Docker Compose can handle a three-node replica set on a single machine for development purposes, though production replica set members should live on separate hosts.
Sharding — MongoDB’s horizontal scaling mechanism, which splits data across multiple shards based on a shard key — comes into play at a different order of magnitude. Most teams that think they need sharding on day one actually don’t. Start with a replica set, instrument your queries, and let real traffic tell you when it’s time to scale the architecture rather than the speculation.
The broader trend here is worth acknowledging: document databases have moved from novelty to infrastructure staple over the past decade. Running MongoDB on Ubuntu gives you access to a flexible schema model that lets you store BSON documents without a predefined structure, which has proven genuinely useful for the kind of semi-structured data that modern applications generate. Whether it’s the right choice for your use case is a separate conversation — but if you’ve already decided it is, getting it running correctly and securely is the only first step that matters.